Stripe and LemonSqueezy Coupon Integration
Overview
This guide provides a detailed walkthrough for integrating coupons in your Stripe and LemonSqueezy payment systems.
Stripe Coupon Setup
Creating Coupons
- Login to your Stripe account.
- Go to Product Catalog > Coupons.
- We need different coupons for test and live modes. If you want to create a coupon for test mode, make sure test mode is toggled on. Otherwise, create a coupon for live mode.
- Click on the Create Coupon button.
Configuring Coupon Details
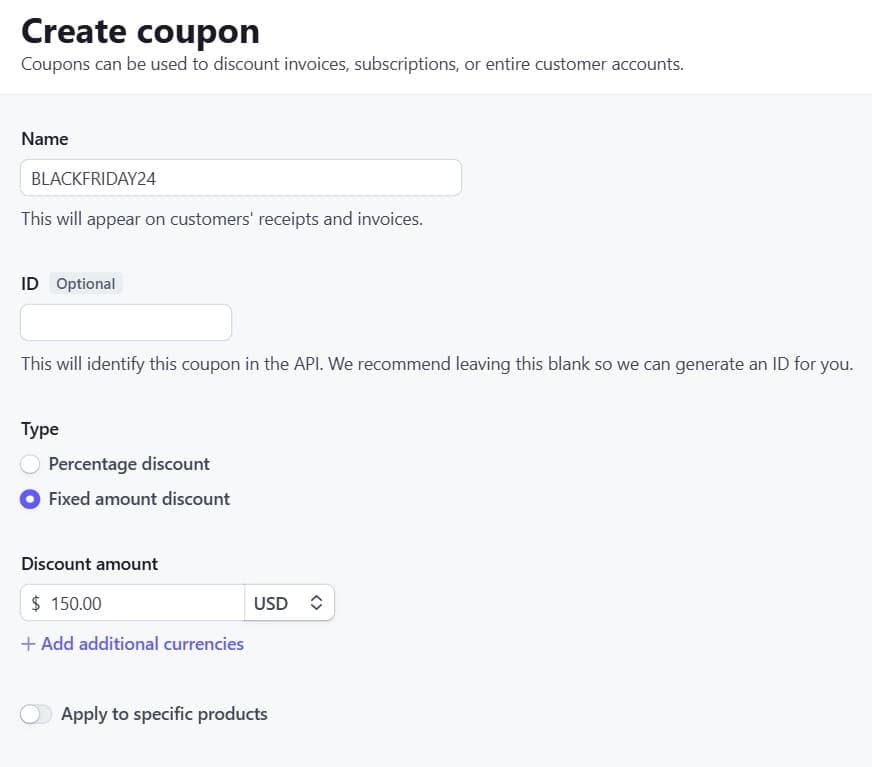
- Give a name to your coupon.
- Fill in other relevant details like discount type (percentage or fixed amount), duration, etc.

- Apply the coupon to specific products or all products as per your requirement.
Automatic Coupon Application at Checkout
-
Disabling Customer-Facing Codes
- Make sure "Use customer-facing coupon codes" is not checked.

- Click on the Create Coupon button.
-
Copy Coupon ID
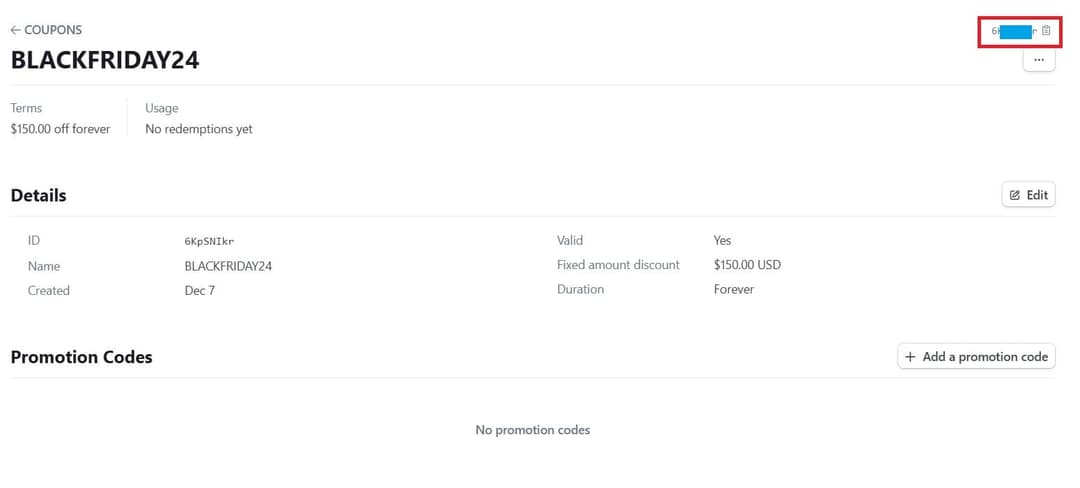
- Click on the coupon that you created.
- Copy the coupon ID from the top right corner.

- We will use this coupon id in the
settings.jsfile.
-
Update
settings.js- The
settings.jsfile, located at/settings.js, is the central configuration file for your StartupBolt application. This file contains various settings that control different aspects of your app, allowing for easy customization and management of your project's core parameters. - Open the
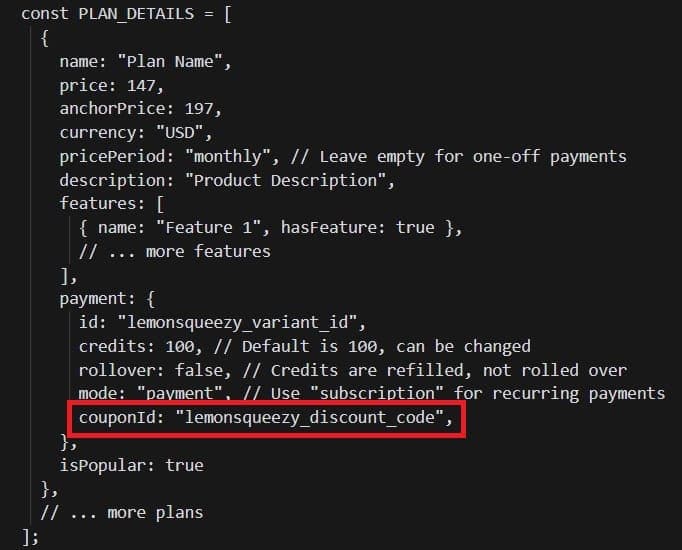
/settings.jsfile. - Find the
PLAN_DETAILSarray. - Add the coupon ID to the
couponIdproperty of the payment object in thePLAN_DETAILSarray.

- The
That's it! You have successfully created a coupon and added it to the PLAN_DETAILS array. When a user clicks on the plan, the coupon will be automatically applied!
Manual Coupon Entry by Customers at Checkout
-
Enable Customer-Facing Codes
- Make sure "Use customer-facing coupon codes" is checked.
- Give a name to your coupon.
- Fill in any other relevant details.
- Click on the Create Coupon button.

-
Update
settings.jsfor Customer-Facing Coupons- Open the
/settings.jsfile. - Ensure the
couponIdproperty of the payment object in thePLAN_DETAILSarray is not present or is empty.

- Open the
That's it! When a user clicks on the plan, they will be able to enter the coupon code on the checkout page.
LemonSqueezy Discount Setup
Creating Discounts
- Login to your LemonSqueezy account.
- Go to Store > Discounts.
- We need different discount codes for test and live modes. If you want to create a discount for test mode, make sure test mode is toggled on. Otherwise, create a discount for live mode.
- Click on the + icon on the top right corner and then click on New Discount.
Configuring Discount Details
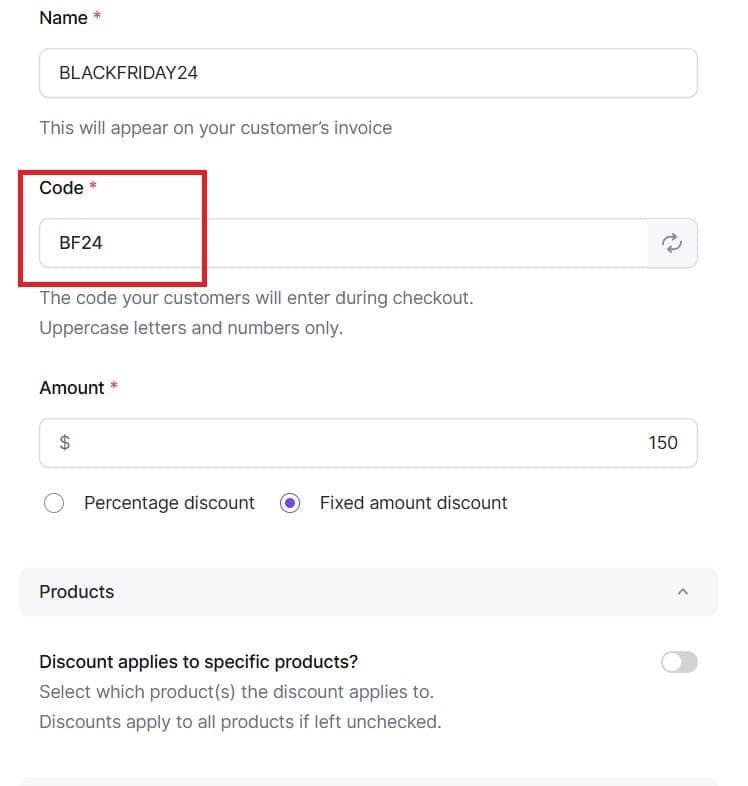
- Enter a discount code. This is the code that customers will use on the checkout page.
- Fill in other relevant details like name, amount, discount type (percentage or fixed amount), etc.

- Apply the discount to specific products or all products as per your requirement.
- Enter any other relevant details and click on the Publish Discount button.
- Copy the discount code from the published discount. We will use it in the
settings.jsfile.
Automatic Discount Application
- Open the
/settings.jsfile. - Find the
PLAN_DETAILSarray. - Add the discount code to the
couponIdproperty of the payment object in thePLAN_DETAILSarray.

That's it! You have successfully created a discount and added it to the PLAN_DETAILS array.
- When a user clicks on the plan, the discount will be automatically applied.
Manual Discount Application
- If the
couponIdproperty of the payment object in thePLAN_DETAILSarray is not present or is empty, the customer can directly enter the discount code on the checkout page.
Closing Remarks
You have now configured Stripe and LemonSqueezy to handle coupons and discounts in both test and live environments. This ensures a seamless payment experience for your users.